Sunday, June 24, 2012

Mmmmargaritas

Mmmmargaritas anyone? 
It's time for another Made Especially for You challenge! This week we are working with the heat embossing technique, I for one LOVE it!
 Here's how I created the background using the heat embossing technique. 
I stamped Peachy Keen's Lattice Background stamp with VersaMark and used white embossing powder.  
 After heat embossing it, I used Tim Holtz Spun Sugar Distress Ink to give it color.
(I saw this stamp/color from Nikki aka Scrappin Navy Wife - here)
 I'm not sure if you can see, but the sentiment is also heat embossed -with pink embossing powder. 
The sentiment is from Market Street's Tiki Time set. 
I colored the drinks with copic markers. Yes, I'm still a newby LOL 
Both the drinks are stamped images from Market Street's Tiki Time set also. 
 I added stickles to look like salt. 
The twine is Charcoal from The Twinery. 

Come join us at Made Especially for You and show us your cards using this technique! 
The winner will receive a $10 gift certificate to Adams Acres.


Also linking this up to Peachy Keen's Anything Goes challenge =) 

Thank you for looking!
♥ Cyndy

Thursday, June 21, 2012

espressly for you - cricut box

Hello everybody! Over at Joy's Life we are playing with tags! 
I have been dying to use this box since I got the cartridge through that Gypsy promo a while back.
. The "heart box" is from the Tags, Bags, Boxes, & More cartridge.
I cut the box at 8.25 inches. 
Now, here's where it gets a little complicated. 
The box I used is the one from the Blackout feature. I positioned the heart from the Baby Steps cartridge (Page 55, Button 35 under "Phrase" size 1.75 inches) right where I wanted it. I love this heart because it's so juicy!
If you need the box fast, you can simply cut the box using the Window feature and it will cut with a heart. 
The sentiment and heart are from Joy's Tag You're It Set One.
I heat embossed them with white embossing powder. 
The heart and it's shadow are also from  the Baby Steps cartridge (Page 55, Button 35 under "Phrase" size 1.75 inches)
I made my own heart shaped tag using a paper piercer. 
 
Do you save the clam shells that the cartridges come in? Well, I do! I just trim them and to my scrap drawer they go! I finally got to use one! 
 I just trimmed it to cover the heart and used regular ATG tape to adhere it. 
 I hope you can see it in this photo. 
 The twine is Posy Pink  from Trendy Twine.
The polka dot paper is from DCWV's Playtime stack.  

Don't forget to check out Joy's DT for more fun projects using tags! 

Thanks for looking! 
♥ Cyndy

Wednesday, June 20, 2012

creating your own background with Tim Holtz Distress Inks

Hello everybody, it's time for another Craft 'n Chat Thursday over at Made Especially for You! 

Today I have a mini picture tutorial on ways to use Tim Holtz Distress Inks to make your own backgrounds. 
All of these tags are from the Tags, Bags, Boxes & More cartridge. 
They're cut at 2.75" width (That's right, width LOL, I was working with some scraps)
 Technique 1: 
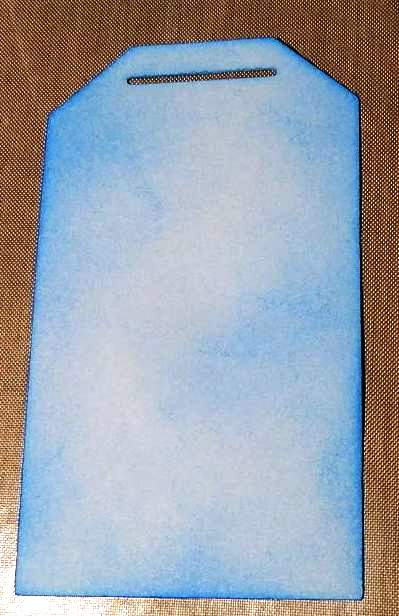
 Get the foam applicator, ink it up, and start adding ink to your paper! 
(This one is Salty Ocean from the Summer seasonal set, I ♥ the colors in this set)
You can keep adding more color until you get the look you like. 
You don't have to necessarily use one color, you can use as many as you like!  
 Technique 2
Rub the ink pad on your craft sheet lightly. 
Then use your mini mister to spray some water.  
Just press your paper on it and use a heat tool to dry it up. 
You can keep adding colors until you're satisfied with the look of it.  
 Technique 3
This is pretty much the same as technique one. Just add the colors you want on your tag. 
 Lightly splash water to create this blotchy look. 
I mean lightly, otherwise you'll get big blotches like this one. 
You can use a small brush, dip it in water, and create your blotches. 
 Extra:
Who says these inks are limited to paper?
Check these primas out! 
 I just inked them up with Vintage Photo Distress Ink. 
Here's the final look for a vintage look.  


Thank you for looking! 
♥ Cyndy

p.s. 
You still have time to join this week's challenge!
Check it out here! 

Tuesday, June 19, 2012

Summer Lovin'

♫ Summer lovin' had me a blast, met a boy cute as can be ♫

I just couldn't get this song out of my head after using this sentiment. 
It's time for another Krafty Girls challenge!! This week's challenge is to create a paper project that follows the theme, Fun the the Sun. Anything that inspires you about summer.


I made this card for my co-worker, she recently got married and went to Hawaii for her honeymoon and is returning tomorrow although here in California it's starting to feel like summer already! 


This darling girl is from Life's a Beach cartridge.
 Her face is from Peachy Keen's Princess Face assortment. 
The sentiment is from Pink by Design's Simply Everything. 

Does that cloud paper look familiar?? Well I just used it on my project a few days ago and had this scrap left over and I just couldn't bear to skip using it! I just had to trim a little and perfect! 
It's from Echo Park's Hello Summer paper pad. 
I ♥ Echo Park!!

Linking up to : 
Celebrate the Occasion - Welcome Summer
Sarah Hamer Designs - Link Up Tueday 


Come join us with your summer themed creations here! 
 Thanks for looking! 
♥ Cyndy

Sunday, June 17, 2012

Hugs and Kisses

Good morning and happy Monday to all of you!
It's time for another Made Especially for You challenge. 
This time it's an easy one. Just use three eyelets. 

I went with a very C-A-S look. 

I heat embossed the tic-tac-toe grid with white embossing powder on white paper, I then used Tim Holtz Tattered Rose distress ink to ink up the paper. 
The tic-tac-toe grid along with all of the stamps on it are from My Creative Time's 100% Sweetness Stamp Set. 
The scalloped ribbon is from American Crafts. 


This week's sponsor is  Whimsical Designs and the prize is a stamp set! 
We would love to see your creations using three eyelets, please make sure to join us here! 

Thanks for looking! 
♥ Cyndy